How to create feeds on Kooomo for your marketing campaigns
A quick guide to install the 1-click integration for creating your feeds on Kooomo Platform. Using this integration, you can create feeds based on Google Shopping standards that can be used on different platforms: Google AdWords, Facebook, Criteo and in general all the platforms that respect Google Shopping Standard Requirements.
1. Plug In Admin Panel
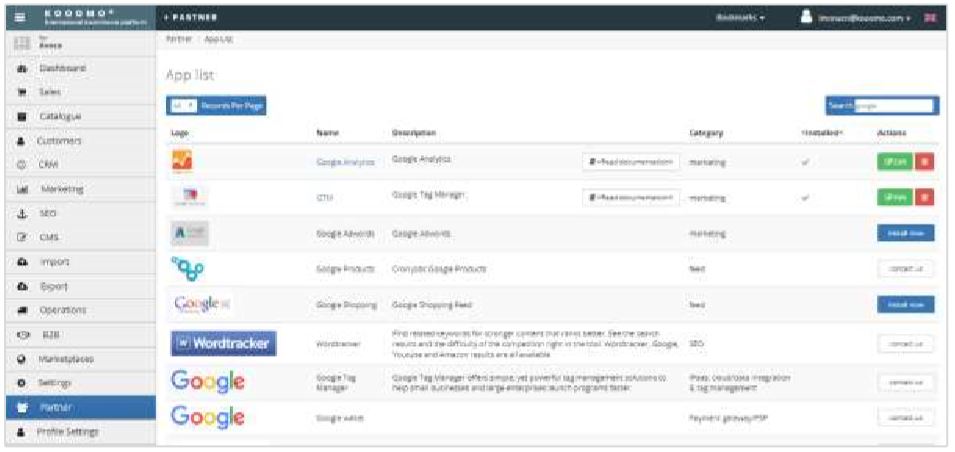
Go to the Plug In Admin Panel. On Kooomo back end, follow this path > Partner > App List and search for Google Shopping (otherwise, on the Kooomo back end type /admin/adminplugin/ on your browser). Click on “Install Now".
2. Install
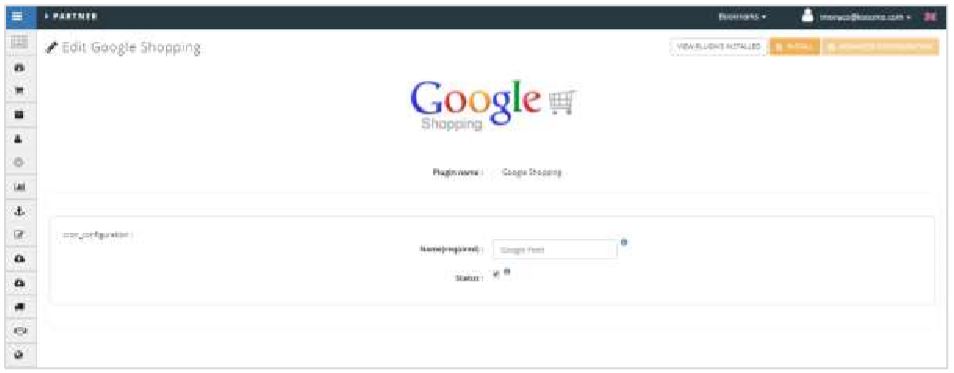
Name the configuration (you can leave the standard one), check the “Status” to activate it and click on “Install”. Now go to “Advanced Configuration”.
3. Advanced Configuration
On this panel you can create your feeds. Please note, you can create all feeds that you need defining:
- Target country (most important, Google is targeting the Shopping campaigns based on the country)
- Target language (you can create more feeds in different languages for the same target county based on your needs)
- Category root (define the categories that you would like to export into the feeds)
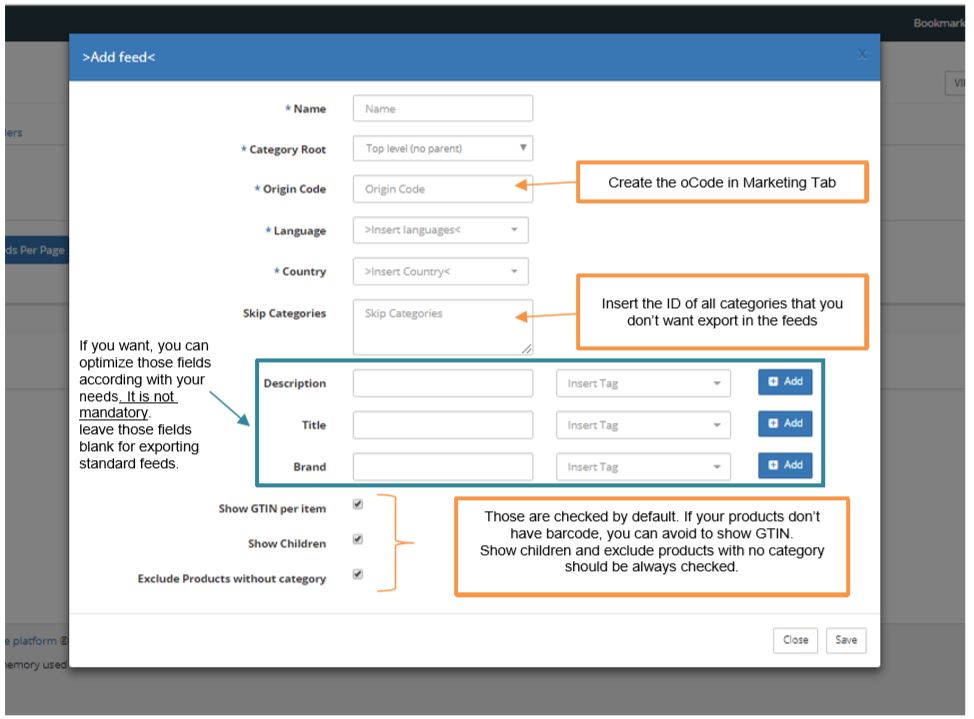
As you can see below, to create a feed you need to define:
Mandatory
- Name (choose a name for your feed)
- Category Root (the main one)
- Origin Code (Create an oCode in the Kooomo Marketing Tab, campaign)
- Language (define the language that you want to target)
- Country (define the Country that you want to target)
- Category to skip (if needed)
Optional
There is the possibility to customize the feeds according with your needs. This part is NOT mandatory, please leave those fields blank if you don’t know how to optimize the feeds. Our suggestion is to check with your digital marketing agency to define the rules. Usually, it is a good strategy to add your brand of the product title for Google Shopping.
You can optimize “Title”, “Description” and “Brand” according with your needs and your data entry (in those fields you can add variables or you can add text manually, but pay attention adding text you will overwrite the information in the feed for those specifics fields).
Please note for the TITLE: without any customization, the standard “Title” will be [Product Name] + [color]
So you can add the variable and text before and after.
- Click on “Save” to save your feed. Repeat the process if you want create more feeds.
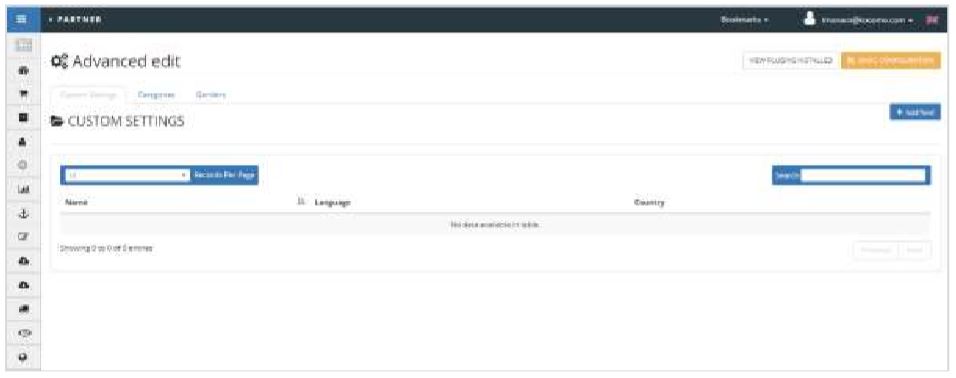
4. Advanced Configuration: category mapping
An important step for creating the right feed is the way you map your categories. This is the way you communicate your feeds to Google and how your website categories match with the Google Taxonomy. This helps Google to show your products to the right people, in accordance with users search on Google. Please note: Even if only one category is not mapped, you will have some errors in your feeds. You have to map all the categories before exporting. Don’t forget to “Save” your mapping.
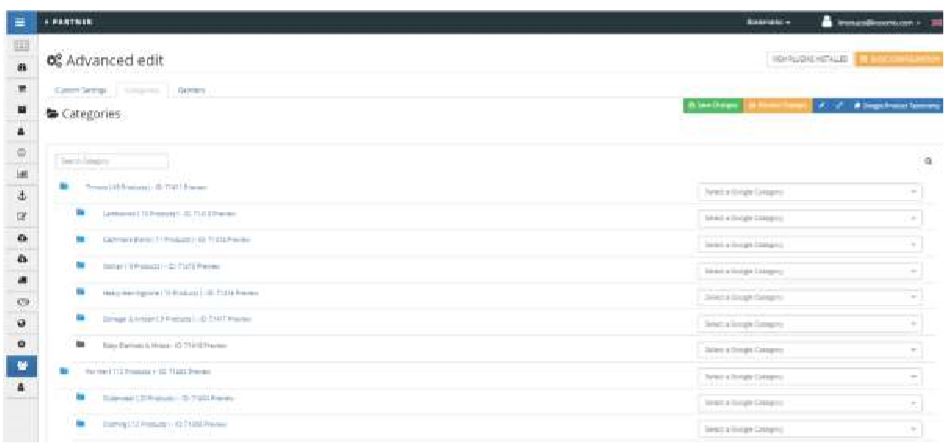
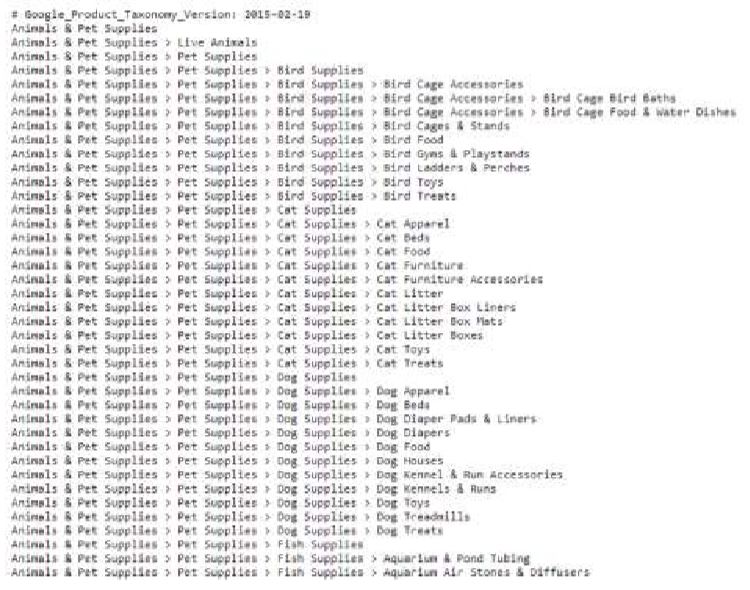
By clicking on “Google Product Taxonomy” you can quickly check all the categories and search for what you need for your products. The more details included, the easier it will be for Google to list your product correctly. If you don’t find a perfect match, we suggest you to choose a more generic one.
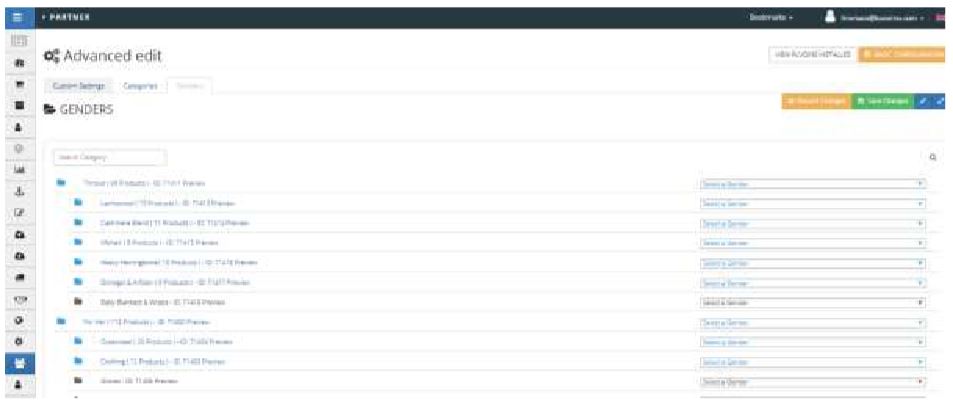
5. Advanced Configuration: gender mapping
For each category, you have to define the gender: male, female or unisex. Don’t forget to “Save”.
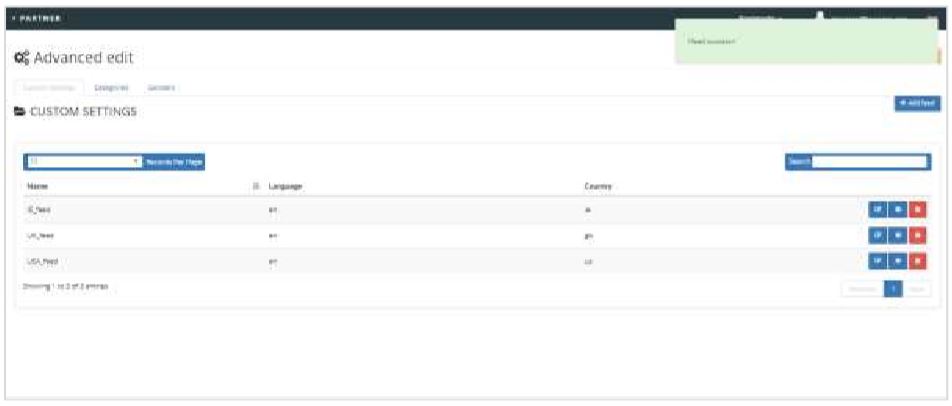
6. Advanced Configuration: generate the feeds
Go back to “Custom settings” tab and click on the “Gear” icon to generate the feeds. You will receive the feed (a url/XML file) by email after a few minutes (it depends on how many products your merchant have).
7. Check your email
Check your email and test your feed. Our advice is to do a test on Google Merchant to be sure that the feeds are correct. Please note, the plug in is exporting your data entry, so if you notice some errors, they will likely be related to data entry issues. Please check your catalogues and products.